Getting started with IIS 7.x
How to setup IIS for the first time
This how-to explains how to setup IIS 7.x for your first website. It assumes you have already installed IIS on your system.
Start the Internet Information Services (IIS) Manager (Start > Internet Information Services (IIS) Manager)
* If IIS 6 is available, do not use it.
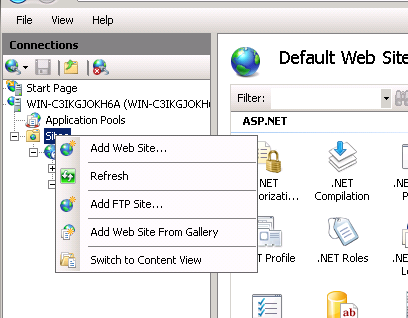
Right click on Sites > Add Web Site
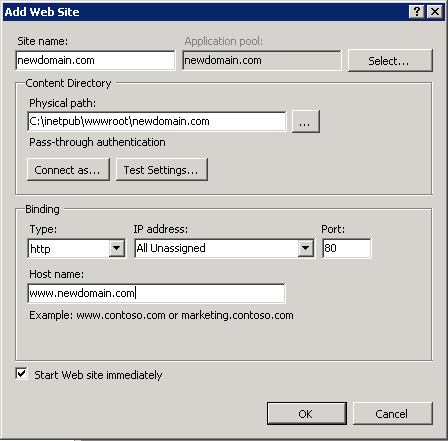
In the Add Web Site pop up window:
a. Site Name: I recommend using the FQDN (newdomain.com), but this is not required.
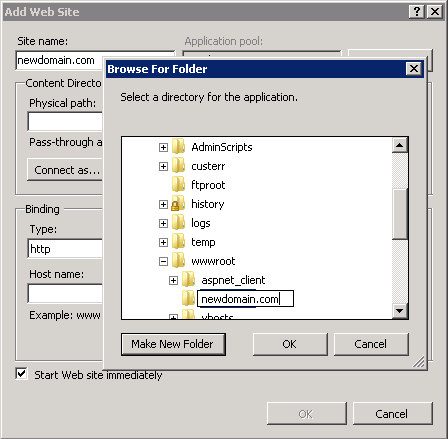
b. Physical Path: Select the folder for your site files. Recommended locations include :
C:/inetpub/wwwroot/newdomain.com or C:/inetpub/wwwroot/vhosts/newdomain.com
* You will need to create this folder if it does not already exist or you will get errors.
c. In the Binding section, select Type: http, IP address: All Uunassigned (unless you require a dedicated IP) and Port: 80.
d. For the Host name, use your domain’s FQDN. This is very important if you are using a shared IP! (I don’t think this is required for domains on dedicated IPs)
e. Check [X] Start Web site immediately and then click to start your website
Your domain should now be available online, however you will probably get the following “Server error: 403 – Forbidden: Access is denied. You do not have permission to view this directory or page using the credentials that you supplied” until you add content.


Comments
So empty here ... leave a comment!