How to create a snapshot in Hyper-V
Introduction
The ability to create snapshots is one of the best reasons for dividing your workloads into different virtual servers. If a specific service crashes, you can quickly restore it to a previously known setup with very little effort.
I especially appreciate this feature when running a training class. I can create a snapshot of a VM prior to class, then teach students how to perform certain functions hands on. In the event something goes catastrophically wrong (and it will!), simply restore the machine to the exact condition it was in when the snapshot was originally created!
Multiple snapshots can be created per virtual machine, so it is possible to restore a VM to any state you had created a snapshot for.
How to create a snapshot
Open the Hyper-V Manager
How to open the Hyper-V Manager
Select the Virtual Machine
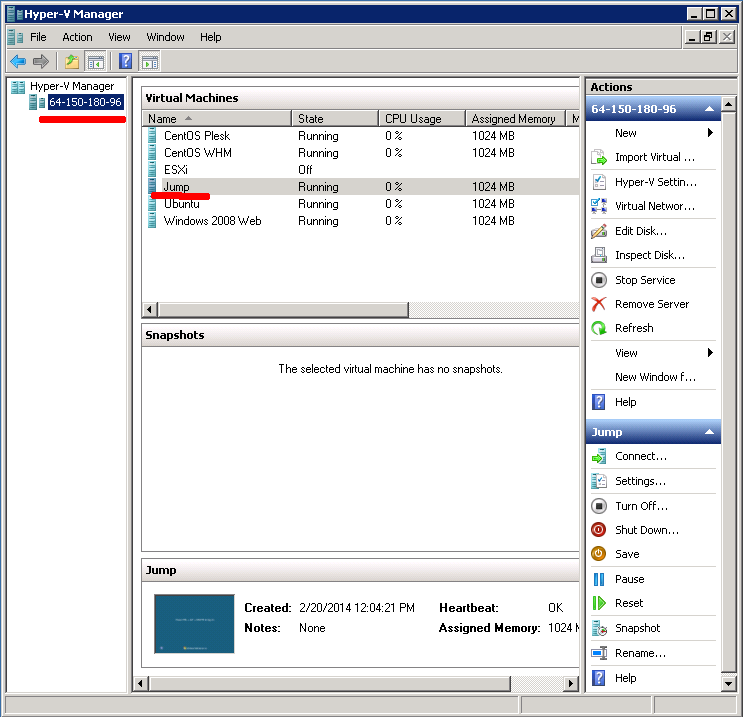
Once inside Hyper-V Manager, click the server name in the left column under “Hyper-V Manager”, then click on the desired virtual machine. For our example, we will create a snapshot for the Virtual Machine named “Jump”.
Create the snapshot
In the far-right column under the name of the VM you have selected, click “Snapshot”
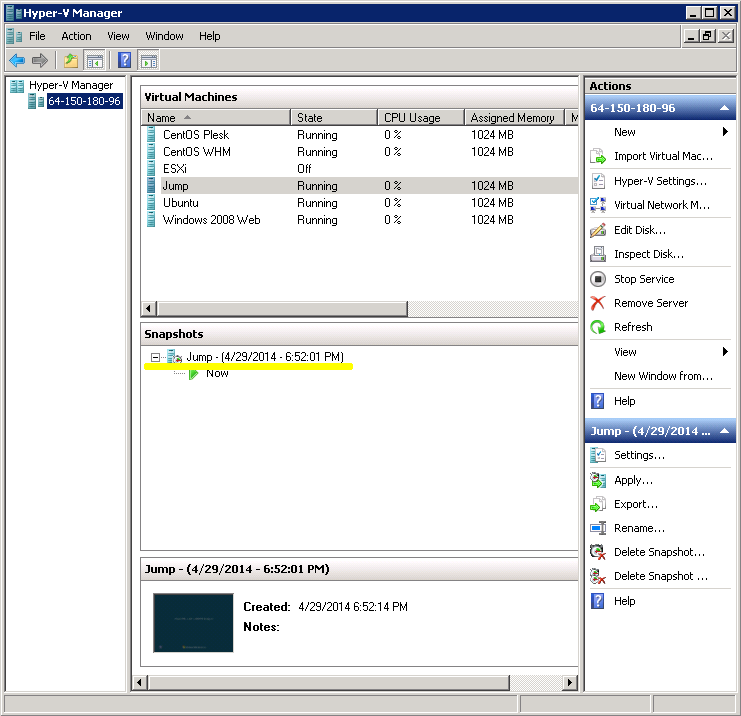
Snapshot created
After the snapshot is created, you will see it listed in the center column under “Snapshots” (Underlined in Yellow)
Rename the snapshot (Optional)
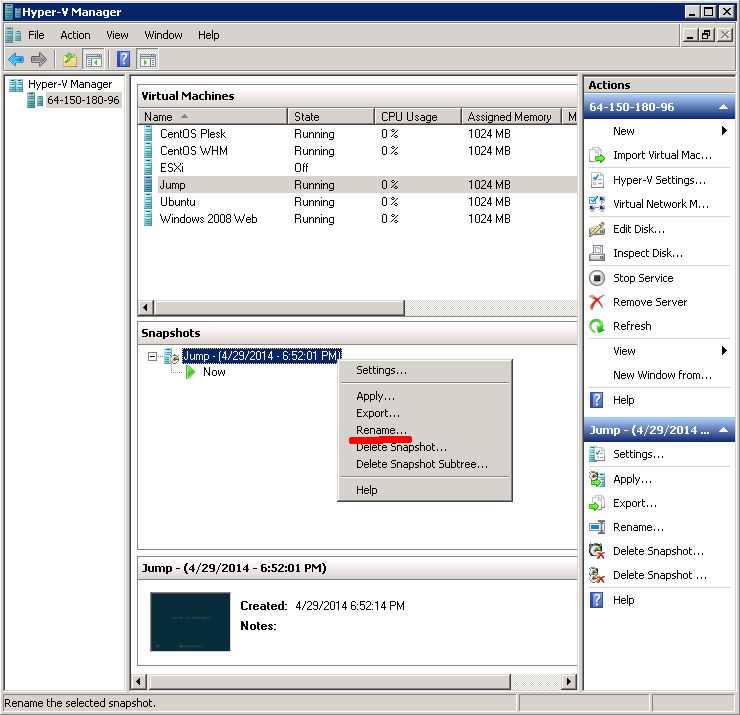
By default, the snapshot will be named with the VM name, the date and the time the snapshot was taken, however you are more than welcome to change this.
To change the name of the snapshot, simply right click on the snapshot, then select “Rename…”
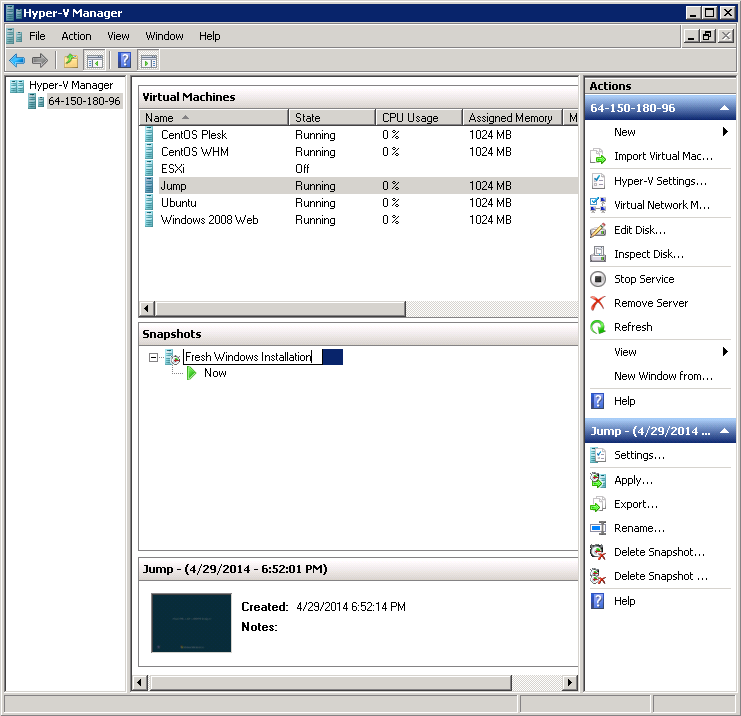
Enter the new name, which often will have more meaning than just the date and time, and press
Creating additional snapshots
You can create as many snapshots as you disk space to allow for. Simply repeat the steps outlined above. Each subsequent snapshot will appear under the current snapshot where you see -> Now displayed.


Comments
So empty here ... leave a comment!