How to create custom nameservers with GoDaddy domains
Log In
Log into your account at http://godaddy.com
Click Domains
From the My Account screen, click DOMAINS
Launch Domain
Locate your domain in the Domains Panel, then click the green <span style=”padding:.5em;background-color:green;”>Launch</span> button across from that domain.
Create Custom Nameservers
If you are using pre-defined nameservers (such as ns1.codero.com, or ns1.domaincontrol.com) you should skip this step. Use these steps ONLY if you wish to create your own nameservers and will be hosting your own DNS.
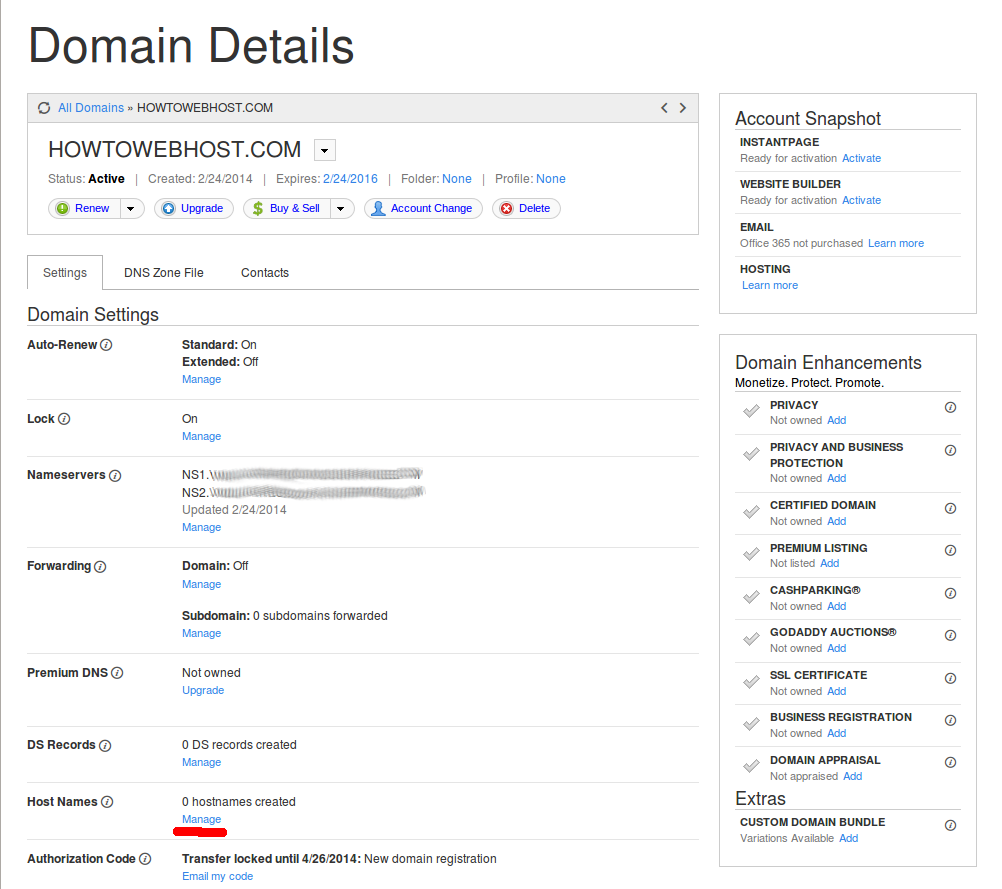
Scroll down to Host Names and click Manage
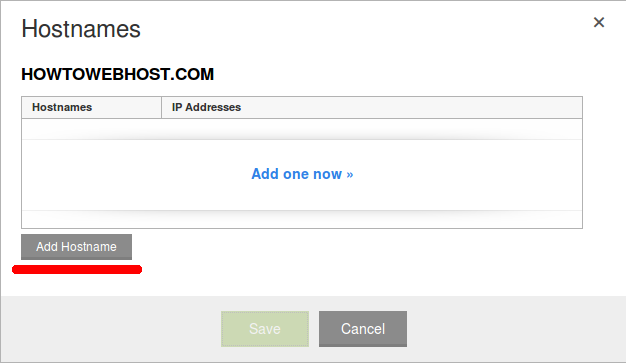
On the Hostnames screen, click Add Hostname
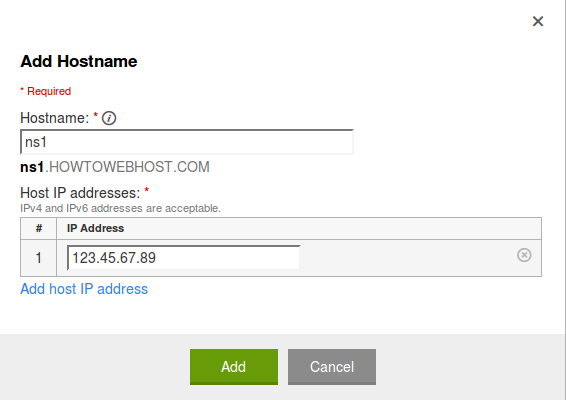
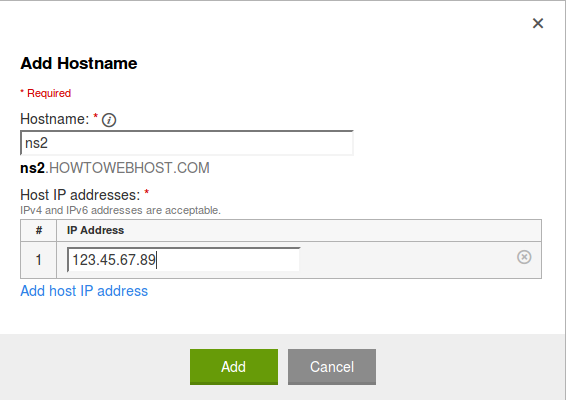
On the next screen, type the SUBDOMAIN (example: ns1) in the Hostname field and enter the IP address your DNS server. Then click Add
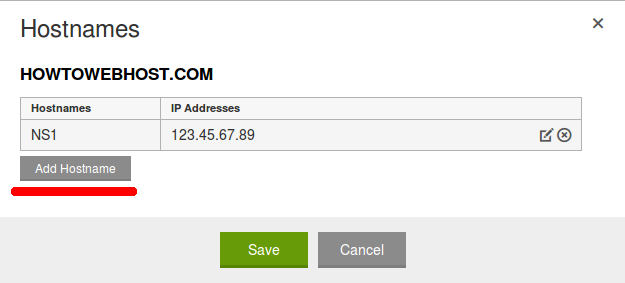
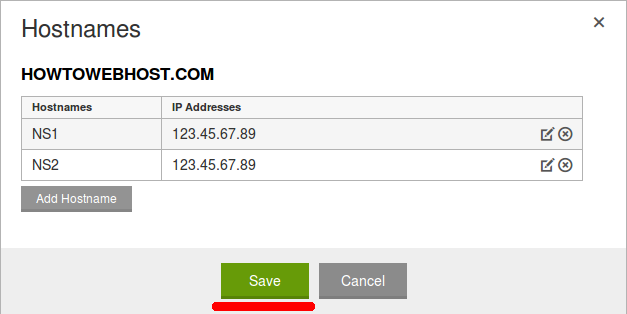
You will now see your newly created nameserver. Click the Add Hostname button and repeat the process for any additional nameservers (ns2) you wish to create.
Save Nameservers
After you have created all the nameservers you desire, click Save.
Set Nameservers
On the Domain Details screen, scroll down to Nameservers and click the link for Manage
Add Nameservers
On the Nameserver Settings screen, select (*) Custom, then click the Add Nameserver button.
Enter Nameservers
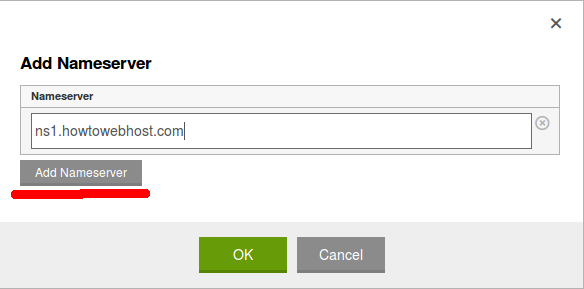
On the Add Nameserver screen, enter the nameserver you wish to use. If you are using an existing nameserver, enter it here. If you are creating custom nameservers, select a subdomain (commonly ns1 or ns2) followed by your domain name. Example: ns1.howtowebhost.com
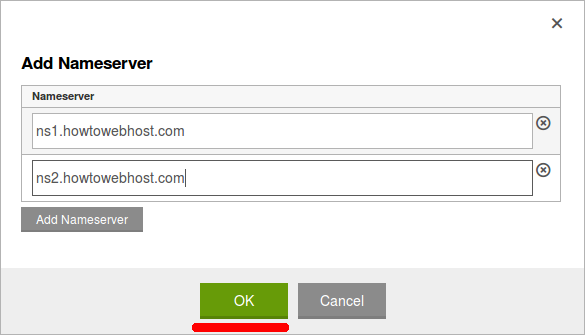
If you are going to add a second nameserver, click the Add Nameserver button and enter the next nameserver. Click the green OK button when you are finished.




Comments
So empty here ... leave a comment!